If you’ve ever opened a control cabinet and found a tiny PC hanging by its own cables… you already know the problem. The box might be fine. The install is not. And when the install is messy, your downtime gets longer, your wiring bay gets uglier, and the tech on-site starts cursing your name (quietly, but still).
My take: mounting isn’t “nice to have.” It’s part of reliability. So let’s pick DIN-rail or wallmount accessories the same way you’d spec airflow or I/O: based on the real enviroment, service habits, and cable discipline.
Mounting option: DIN-rail vs wallmount vs hybrid (VESA + wall)
Here’s a simple comparison you can hand to a teammate, a distributor, or the customer who keeps saying “just stick it somewhere.”
| Mounting option | Typical places | Why people pick it | What usually goes wrong | Good fit when… |
|---|---|---|---|---|
| DIN-rail bracket | Control cabinet, weak-current box, PLC panel | Fast latch on/off, tidy cable runs, less floor clutter | No airflow gap, bad grounding, cables tug ports loose | You want clean wiring and fast swaps |
| Wallmount bracket | Office wall, kiosk base, shop counter, behind counter | Flexible position, easy access, fewer parts | Wrong anchors, no strain relief, blocked vents | You need easy service in open spaces |
| Hybrid (VESA + wall) | Screen back, meeting room, digital signage | Hide the ITX box, short HDMI/USB | Heat trapped behind display, cable bend radius | You want “invisible” installs without chaos |
| OEM/ODM bracket set | Odd cabinets, mobile carts, harsh sites | Custom hole map, captive nuts, consistent fit | Drawing mismatch, lead time surprises | You need repeatable fleet installs |
The point: start with where the box lives, not what bracket looks cool.
Mounting environment first: control cabinet, kiosk base, screen back
DIN-rail control cabinet install
DIN-rail shines when you’re inside a cabinet and the wiring bay is sacred. You hang the ITX case close to terminal blocks, keep CAT6 short, keep DC leads neat, and reduce “wire spaghetti” that turns troubleshooting into a treasure hunt.
Use DIN-rail if you care about:
- Short patch runs (less noise pickup, less snag risk)
- Faster swap time (lower MTTR, fewer screws, less drama)
- Cabinet hygiene (labeling, clear wire duct lanes)
A solid example is a compact ITX chassis with real storage + expansion, like the Mini ITX Case Model ISC ITXS25 M 2HDD PCI USB2 Aluminum. Two 2.5″ bays plus half-height expansion can cover edge logging, dual NIC, capture card, small RAID1… without jumping to a bigger frame.
Wallmount office wall and kiosk base
Wallmount wins when the cabinet doesn’t exist. Think retail POS closets, a tiny comms room, a kiosk base, or “the only free wall behind the counter.”
Wallmount is great, but don’t do the classic fail:
- You hang the case.
- You leave cables dangling.
- The HDMI plug becomes the “mounting bracket” over time.
If you wallmount, treat ports like fragile joints. Add strain relief. Give cables a service loop. Your future self will say thanks.
Hybrid VESA + wall behind display
Screen-back installs look clean. They also trap heat and pinch cables if you rush it. Hybrid setups work best when you plan:
- Vent gap behind the panel (don’t choke convection)
- Cable bend radius (HDMI hates sharp corners)
- Access path for quick reboot or drive check
If you want this to scale across dozens or hundreds of sites, standardize the bracket and fasteners early. That’s where OEM/ODM saves you from “every install is different.”
DIN rail size: 35 mm top-hat and 7.5 mm / 15 mm depth
DIN-rail is not “any metal strip.” In the field, you mostly see the 35 mm top-hat rail, and the common depths are 7.5 mm and 15 mm. Your DIN clips/brackets need to match that.
Quick reality check before you ship hardware:
- Confirm rail profile in the cabinet drawing (or get a photo)
- Confirm clip depth compatibility (7.5 vs 15)
- Confirm you can latch/unlatch with gloves on (yes, really)
If you ignore this, you’ll end up with brackets that “almost fit,” which means they don’t fit.
Cable management: strain relief, service loop, labeling
This is the part people skip, and it bites them later.
Strain relief for RJ45, USB, and DC leads
Ports aren’t load-bearing. If the install vibrates (factory, kiosk, mobile cart), a loose cable can cause random drops that look like software bugs. That’s the worst kind of ticket.
Do these three things:
- Add a strain relief bar or tie point near the I/O side
- Leave a service loop (a little slack, not a bird nest)
- Label both ends of power and SATA leads (dont rely on memory)
Natural “ops” slang that matters
If you’re selling to IT teams, talk like they do:
- “We’re trying to reduce MTTR.”
- “We want clean cable plant.”
- “We need less door-open time in the cabinet.”
It signals you get the pain, not just the metal.
Thermal clearance and vertical mounting
Mounting hardware can quietly ruin cooling.
Thermal clearance around the case
Even a small ITX box needs breathing room. Give it a gap so air can move. A tight backplate against a warm wall is basically a slow cooker.
Rules that work in real installs:
- Don’t press the chassis flat to a hot surface
- Keep intake/exhaust paths open
- Avoid stuffing power bricks in the same dead-air pocket
Vertical mounting for better convection
If you can mount vertical, do it. Heat rises. You’re not “cheating physics,” you’re using it. Also, vertical installs reduce dust settling on horizontal vents. Not perfect, but it helps.
Wall anchors and load path
Wallmount failures usually aren’t about the bracket. They’re about the wall.
Before you drill:
- Identify wall type (concrete, wood stud, drywall, sheet metal)
- Pick anchors that match it
- Think about the load path: weight + cable pull + someone bumping it
And please, don’t reuse random screws from a drawer. That’s how installs become “temporary forever.”
Maintenance and fast swap: bracket commonality
Here’s the argument I’ll stand on: the best mounting plan makes servicing boring.
If you run a fleet (edge gateways, kiosks, lab rigs), you want:
- Same bracket pattern across models where possible
- Captive hardware or standard fasteners
- Clear access to drives, NICs, and power
This is also where volume buyers start asking for tweaks: latch tension, hole map, grounding points, even pre-installed PEM nuts. That’s normal. It’s how you build repeatable installs.
If you want that level of control, use an OEM/ODM path like Server Case OEM/ODM. It’s not only for giant data centers. Small integrators do it too, because truck rolls are expensive in time, not just money.
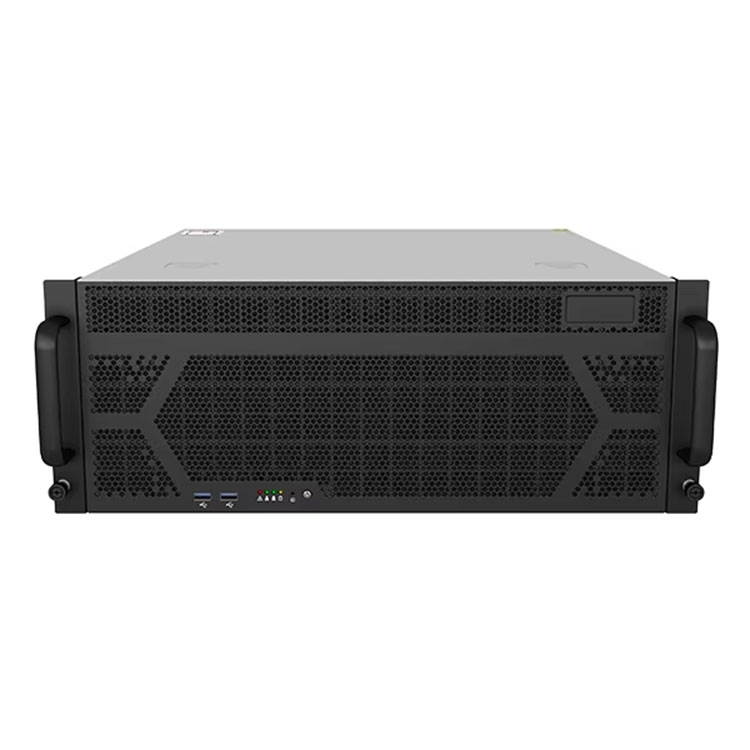
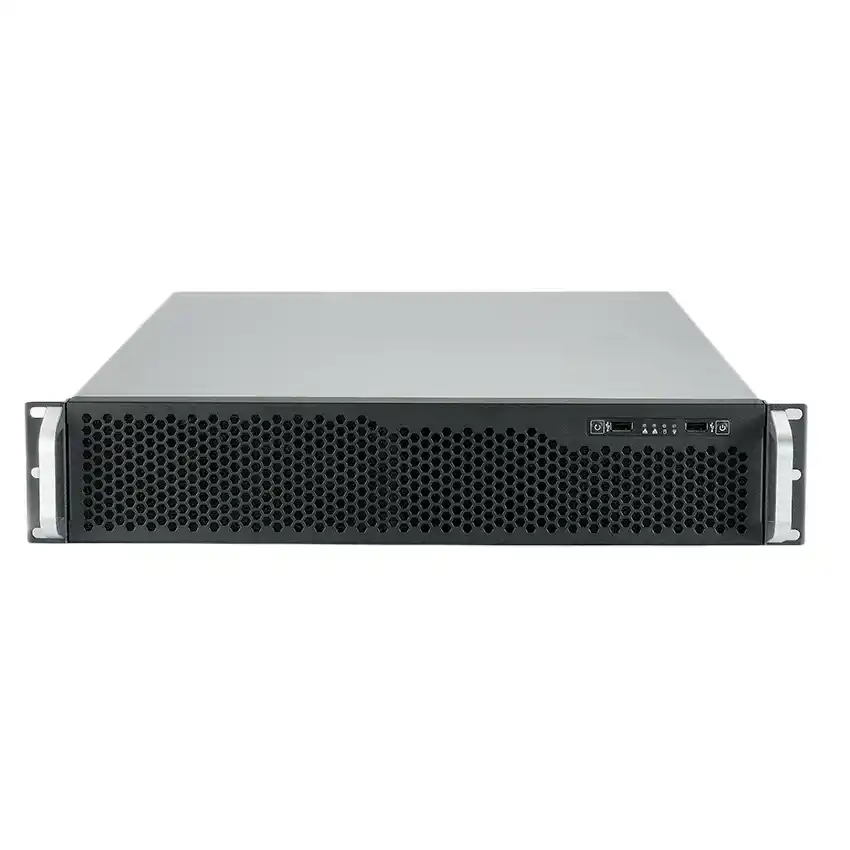
From ITX mounts to rack deployments: server rack pc case and guide rails
Some teams start with ITX at the edge, then grow into racks in the core. The thinking stays the same: mount clean, service fast, keep airflow honest.
If you’re speccing a server rack pc case for the data room, you already care about repeatability. Pair it with proper rails like Chassis Guide Rail so techs can slide nodes in/out without doing the “hold it with one hand, screw with the other hand” dance.
And yes, buyers still search messy phrases like server pc case or computer case server. If your build needs a standard board layout and easier service space, stepping up to an atx server case can make ops happier.