Свяжитесь с нашими Серверное шасси Инженеры и отдел продаж
24 тысячи подписчиков
Сообщите нам о назначении оборудования, типе шасси, высоте стойки, материнской плате, графическом процессоре, отсеках для дисков, блоке питания, системе охлаждения, разъемах ввода-вывода и количестве, необходимом для заказа. Наши инженеры и специалисты отдела продаж подберут для вашего проекта стандартную модель или конфигурацию по схеме OEM/ODM.
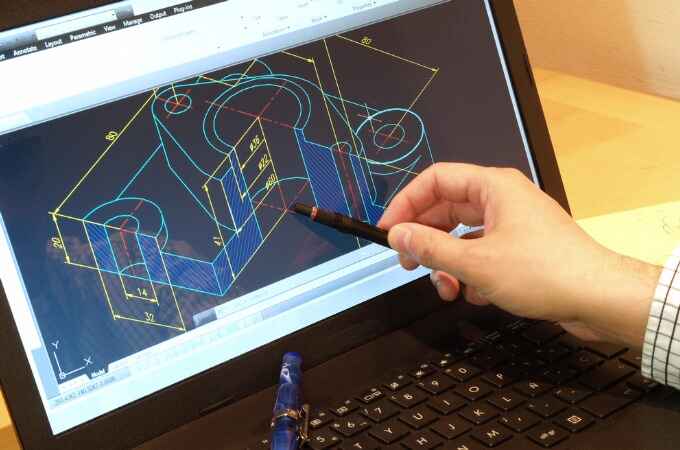
Moving from CAD to prototype is not a file-conversion exercise. It is a controlled engineering process that turns design intent into something a factory can build repeatedly.
DFM should happen before the first production-intent prototype, not after a supplier discovers impossible bends, inaccessible fasteners, tolerance conflicts, or finishing problems.
A prototype has to verify real hardware fit, assembly sequence, structural behavior, cooling, service access, finish, and manufacturing repeatability.
CAD dimensions alone are not enough. Suppliers also need material specifications, critical tolerances, finish requirements, hardware, BOM information, inspection criteria, and revision control.
The manufacturing method used for a first prototype may differ from the process used at volume. Buyers should understand which differences matter before approving the sample.
One successful prototype proves that one unit can be built. A pilot batch proves whether the prototype manufacturing process can be repeated.
The best suppliers do not blindly manufacture every feature exactly as modeled. They question risky design choices, document proposed changes, and obtain approval before altering the design.
The CAD model looks finished.
That can be dangerous.
A clean STEP assembly, beautifully aligned components, correctly modeled bends, and a drawing packed with dimensions can create the impression that most of the engineering work is already behind you. For a custom server chassis, industrial enclosure, electronics housing, or rackmount system, it often is not.
The difficult part starts when virtual geometry meets metal, tooling, coatings, cables, fasteners, heat, assembly workers, inspection equipment, and production variation.
Industry data explains why engineering teams feel pressure to move faster. Protolabs’ Product Development Trends research (opens in a new tab) surveyed 767 engineers and designers and reported an average product-development journey of about 22 months. Eighty-two percent said they were constantly looking for ways to accelerate development, while 65% said they needed to develop products faster to stay ahead of competitors.
Speed matters.
But fast metal is not the same thing as fast product development.
If the prototype comes back quickly but exposes ten problems that could have been caught during a 30-minute engineering review, the project was not accelerated. It was simply rushed into fabrication.
What Does “CAD to Prototype” Actually Mean?
A serious CAD-to-prototype workflow translates engineering intent into a physical product while progressively removing uncertainty.
For a sheet-metal chassis project, the sequence often looks like this:
Сцена
Главный выход
What You Are Trying to Prove
Typical Failure
Требования
Engineering input package
What the product must do
Missing hardware or conflicting requirements
CAD architecture
3D mechanical design
Components can coexist physically
Clearance or access conflict
DFM review
Manufacturable design
Factory processes can reproduce the geometry
Impossible bends, costly features
Prototype fabrication
Physical sample
CAD assumptions survive manufacturing
Bend, weld, finish, tolerance errors
Assembly validation
Fully populated prototype
Real components fit and can be assembled
Cables, tools, connectors do not fit
Functional validation
Tested system
Structure, airflow and service strategy work
Thermal or mechanical weakness
Design revision
Controlled production files
Every accepted change is documented
Old revision reaches production
Pilot build
Small repeatable batch
Process works across multiple units
Variation appears between samples
Production release
Approved manufacturing package
Supplier can reproduce the product
Quality drift after scale-up
Notice what is missing from that table.
“Send STEP file. Receive box.”
That is not product development.
Stage 1: Freeze the Inputs Before Polishing the CAD
The first question should not be, “What should the chassis look like?”
Ask what has to fit inside it.
For server, storage, GPU, telecom, industrial PC, edge-computing, and network-appliance projects, the enclosure engineer may need to know:
motherboard dimensions and mounting coordinates;
CPU heatsink envelope;
GPU length, height, thickness, and connector direction;
PSU format and cable exits;
drive count and backplane arrangement;
PCIe slot positions;
fan sizes and airflow direction;
front and rear I/O;
cable diameters and minimum bend space;
rack depth and rail requirements;
removable-component strategy;
installed weight;
operating environment;
expected production quantity;
target cost.
This is where disciplined CAD Design for Manufacturing starts paying for itself. The more accurately design intent is defined before geometry freezes, the fewer expensive surprises appear after the first sheet is cut.
“ATX motherboard” is not enough.
Neither is “supports four GPUs.”
Actual part numbers beat category names because real components have connectors, heatsinks, cable exits, brackets, manufacturing tolerances, and awkward little protrusions that simplified CAD envelopes often ignore.
A component may technically fit while its power cable cannot be installed.
That still means it does not fit.
Stage 2: Turn a CAD Model Into a Manufacturable Design
This is the point where engineering intent meets factory physics.
For a sheet-metal project, DFM should review issues such as:
available bend tooling;
internal bend radius;
bend deduction;
hole-to-bend distance;
minimum flange length;
corner relief;
hem geometry;
hardware insertion access;
countersinks;
welding access;
weld distortion;
grinding requirements;
coating thickness;
masking;
grounding surfaces;
assembly sequence;
tolerance stack-up.
Here is an unpopular opinion in our industry: telling the supplier to “manufacture exactly what is in the CAD” is often a poor way to develop a production prototype.
Sounds wrong?
It is not.
A supplier that blindly copies every radius, tolerance, flange, hole position, and bracket may produce something visually faithful to the CAD while completely ignoring whether those details make sense for repeat production.
The better approach is controlled challenge.
If the manufacturer sees a hole too close to a bend, ask whether it can move. If a machined bracket could become a formed sheet-metal part, discuss it. If a tolerance has no functional reason to be ±0.05 mm, question it.
But there is a hard line.
The manufacturer should never quietly “fix” the design.
Any proposed change should be documented, explained, revision-controlled, and approved before fabrication.
That is collaboration.
Silent modification is not.
Tight Tolerances Can Make a Prototype Worse
Engineers like precision.
Factories charge for it.
Those two facts need to meet early.
A tolerance that controls PCIe alignment, PCB mounting, rail fit, connector positioning, or a mating interface may deserve very tight control.
A hidden flange floating inside an enclosure may not.
Applying aggressive tolerances to every dimension can force unnecessary inspection, extra fixtures, slower forming, more rework, and higher rejection rates without improving the assembled system.
Production engineering is not about making every dimension as precise as possible.
It is about controlling the dimensions that matter.
Stage 3: Choose the Prototype Process Based on the Question
Not every prototype needs the same process.
A rough packaging mock-up might be 3D printed.
A structural bracket may be CNC machined.
A near-production server enclosure may need laser cutting, press-brake forming, PEM hardware, welding, grinding, coating, and assembly using processes close to the intended manufacturing route.
Use accurate internal geometry and actual mounting features.
Need to approve appearance?
Use the intended finish, coating texture, color, visible fasteners, panel gaps, and branding process.
Need to approve production?
Now the manufacturing route should resemble production closely enough that the sample exposes realistic process behavior.
That distinction gets missed all the time.
A beautifully machined aluminum prototype does not automatically prove that a later bent-and-welded sheet-metal version will behave the same way.
Prototype Process Comparison
Prototype Method
Best Used For
Main Advantage
Main Limitation
3D printing
Envelope, ergonomics, basic fit
Very fast iteration
Different strength and manufacturing behavior
CNC machining
Precision parts, brackets, functional geometry
High dimensional accuracy
May not represent production forming economics
Laser cut + press brake
Chassis, panels, brackets, enclosures
Close to production sheet-metal behavior
Bend variation must be understood
Soft tooling / temporary fixtures
Pilot quantities
Tests repeatability without full tooling investment
Added setup cost
Production-intent fabrication
Final engineering validation
Closest representation of volume parts
More time and engineering control required
The cheapest prototype is not always the cheapest development decision.
If a $300 sample fails to answer the question that controls a $100,000 production decision, it was expensive.
A Finished CAD Model Can Still Hide a Six-Figure Mistake
Recently, I came across a story from a senior automotive design engineer that stuck with me.
He had designed a large exterior injection-molded component with more than a hundred reinforcing ribs. The CAD looked finished. Moldflow analysis had been performed. Tooling was approved.
Then the first molded parts arrived.
Sink marks.
A lot of them.
The fillets where the ribs met the wall had increased effective material thickness enough to create visible defects on the exterior surface. The problem could not simply be polished away, and the tool reportedly did not have enough safe steel available for an easy correction.
The result was roughly $100,000 in replacement tooling and another 16 weeks of delay.
That story is from injection molding, not sheet-metal chassis production, but the lesson transfers perfectly.
A CAD model can be dimensionally complete while still being manufacturing-incomplete.
The computer only knows what you modeled.
It does not automatically know what the process will do to it.
Stage 4: Build the First Prototype to Find Problems
A first prototype should be treated like an engineering interrogation.
Attack it.
Do not admire it.
For a custom chassis, load it with the real motherboard, actual GPU, production PSU, intended fans, drive trays, cables, backplane, rails, brackets, switches, and connectors whenever those components are available.
Then test the ugly details.
Component Fit
Do motherboard standoffs align?
Does the rear I/O line up?
Do GPU brackets seat correctly?
Is there enough cable bend space?
Can the PSU connector be inserted?
Do drive carriers latch smoothly?
Assembly
What goes in first?
Can a technician reach every screw?
Can a nut be held while its bolt is tightened?
Can the fan wall be removed after the motherboard is installed?
Can the GPU come out without removing unrelated components?
Structure
Does the cover flex?
Does a heavy GPU need additional retention?
Does the chassis twist when lifted?
Do rails carry the loaded enclosure correctly?
Do welded areas distort nearby interfaces?
Охлаждение
Are intake and exhaust paths clear?
Are cables blocking fans?
Are drive cages creating unnecessary resistance?
Is hot exhaust recirculating?
Does the filter add too much pressure drop?
Удобство обслуживания
Can a field technician replace the PSU quickly?
Can failed fans be removed without dismantling the server?
Can drives, cards, filters, and cables be accessed logically?
This is where a prototype earns its cost.
It finds bad assumptions while the quantity affected is still one.
Stage 5: Do Not Approve the Prototype From Photos
This happens more than suppliers like to admit.
Photos arrive in an email.
The chassis looks clean.
Purchasing says, “Approved.”
Not so fast.
A photo cannot tell you whether the board standoffs are shifted 1 mm, whether a GPU cable hits the cover, whether a connector can be reached, whether the rail holes align with the loaded chassis, or whether the assembly sequence requires three hands and a custom screwdriver.
A production prototype should be assembled and reviewed as a system.
That approach becomes even more important in high-density computing, where Production Prototype Development may need to validate GPU support, dense cabling, redundant power, fan walls, airflow restrictions, liquid-cooling hardware, and service access simultaneously.
One interface can move three others.
That is why complete-system testing catches what part-by-part inspection misses.
Stage 6: Treat Finishing as Part of Engineering
Powder coating comes after forming.
Its consequences do not.
Coating thickness can affect:
threaded holes;
sliding surfaces;
latches;
hinges;
panel gaps;
inserted hardware;
electrical grounding;
mating faces;
connector openings.
A prototype built from bare metal and approved for fit may behave differently after coating.
So specify the real finish early enough.
If a surface must remain electrically conductive, mark the masking requirement.
If appearance matters, define visible surfaces.
If a threaded feature should remain clear, say so.
“Black powder coat” is not a complete finish specification.
Stage 7: Move From Prototype Rev A to a Controlled Production Design
Most custom projects change after the first physical build.
That is normal.
Rev A reveals interference.
Rev B moves a connector.
Rev C changes the bracket.
Rev D adjusts the fan wall.
Problems start when those changes live inside email threads, marked-up screenshots, chat messages, and file names such as:
final.step
final-new.step
final-new-2.step
final-new-2-use-this.step
That is not revision control.
Before production approval, the controlled package should align:
3D CAD;
2D drawings;
flat patterns where applicable;
material grade;
sheet thickness;
BOM;
hardware;
weld notes;
finish;
masking instructions;
artwork and labels;
inspection points;
approved sample;
revision number.
The physical sample and digital manufacturing package must tell the same story.
Otherwise the factory may faithfully manufacture the wrong revision.
Stage 8: Understand What Sheet Metal Changes Between CAD and Reality
Tooling has an actual radius. Material batches vary. Bend deductions are process-dependent. Welding introduces heat. Large panels move. Hardware insertion creates local forces. Powder coat adds material.
That does not mean sheet metal is inaccurate.
It means the design should respect the process.
A smart factory builds its bend data from real machines, materials, thicknesses, and tooling rather than assuming that every theoretical CAD value behaves identically on the shop floor.
The CAD model is a definition.
The factory process creates the part.
Both have to agree.
Stage 9: Use the Production Prototype to Freeze Manufacturing Intent
The production prototype is different from an early engineering sample.
Its job is no longer simply to answer, “Does this concept work?”
It should answer:
Can we manufacture this configuration repeatedly using the intended materials, processes, hardware, finish, assembly method, and inspection criteria?
That is a much higher bar.
At this stage, quality starts overtaking pure speed as the dominant concern. In Protolabs’ survey, quality became the top priority as development moved toward production: 86% of respondents selected quality as a priority for ongoing production and 85% for short-term production.
That shift makes sense.
A prototype problem affects one sample.
A production problem multiplies.
Stage 10: Build a Pilot Before Assuming You Are Ready for Volume
One perfect prototype proves one thing:
Someone successfully made one.
It does not prove that 50, 500, or 5,000 units will behave the same way.
A pilot build starts exposing process variation.
Watch for:
bend consistency;
fixture repeatability;
welding distortion;
coating buildup;
hardware insertion quality;
worker interpretation;
assembly time;
cosmetic variation;
purchased-component consistency;
inspection bottlenecks.
This transition remains a major industrial pain point. Protolabs’ Innovation in Manufacturing 2026 report (opens in a new tab) reports that 97% of companies experience delays or failure in bringing products to market, identifying the move into scaled production as a major development challenge.
That number should make buyers slightly uncomfortable.
Good.
Scaling deserves respect.
Why Procurement Needs to Be Involved Before the Prototype Is Finished
Prototype development is often treated as an engineering-only activity.
That can create a commercial surprise later.
Material choice, number of welded pieces, machining requirements, purchased hardware, cosmetic standards, inspection requirements, and tolerance strategy all influence cost.
Autodesk’s 2025 State of Design & Make research for product design and manufacturing (opens in a new tab) found that 35% of product-design and manufacturing leaders identified cost control as a top challenge, while 59% said lack of skilled talent was hindering growth. Sixty-four percent still expected future investment to increase.
So engineering cannot simply perfect a design and hand it to procurement with the instruction, “Now make it cheap.”
Cost is designed in.
A purchasing team should understand expected annual volume before prototype architecture freezes because volume changes which manufacturing methods make economic sense.
Five units and 5,000 units are different engineering problems.
Prototype Cost vs. Production Cost
A common sourcing mistake is optimizing the prototype quotation instead of the production system.
Suppose Supplier A offers a cheaper prototype because it uses more manual work, simplified tooling, or a temporary process.
Fine.
That may be exactly what you need for Rev A.
But before approving production, ask:
Which prototype operations are temporary?
Which processes change at volume?
Will new tooling be required?
Will dimensional behavior change?
Will welded parts become stamped or formed parts?
Will manual hardware installation become automated?
Which tolerances become harder at scale?
What additional fixtures will production require?
Prototype cost should not be confused with production economics.
What Should a Buyer Send to the Manufacturer?
A supplier can only review what it knows.
For a serious custom chassis prototype, send enough information to eliminate guesswork.
A practical package includes:
Design Files
STEP or another neutral 3D CAD format;
controlled 2D drawings;
assembly drawing;
revision number.
Mechanical Requirements
material;
thickness;
general tolerance;
identified critical dimensions;
weld requirements;
PEM or other installed hardware;
finish and cosmetic zones.
Component Data
motherboard drawing;
GPU specifications;
PSU dimensions;
storage configuration;
backplane;
fans;
connectors;
cables;
rails.
Commercial Inputs
prototype quantity;
pilot quantity;
initial production quantity;
expected annual volume;
target delivery date;
destination market.
Quality Inputs
critical-to-quality dimensions;
inspection-report needs;
approved-sample procedure;
traceability requirements;
compliance documentation.
For buyers that need engineering support rather than pure build-to-print fabrication, a Custom Chassis Prototype program should also define who owns CAD changes, who approves revisions, what validation occurs before release, and how the approved prototype is transferred into repeat production.
The Supplier’s Questions Are Part of the Product
Buyers often judge manufacturers by how quickly they quote.
Sometimes that is backwards.
If a supplier receives a complex chassis drawing and immediately returns a price without asking anything about hardware, annual quantity, critical tolerances, coating, assembly, or end use, I get nervous.
Maybe the drawing is perfect.
Usually it is not.
The questions a manufacturer asks tell you whether the team is thinking about the eventual product or simply calculating laser time, bend count, material weight, and labor.
Useful questions sound like:
“Which dimensions control the PCB interface?”
“Does that surface really need this tolerance?”
“Is the prototype finish the production finish?”
“Can we move this hole away from the bend?”
“Do you need that bracket machined?”
“How will this GPU be supported during shipping?”
“Which revision should control production?”
Those questions may slow a quotation by a day.
They can save a project by months.
What a Production-Ready Prototype Should Prove
Before releasing the PO for volume production, I want the prototype to prove five things.
It fits.
The real components install without interference.
It assembles.
A technician can actually build it using sensible tools and a repeatable sequence.
It works.
Cooling, structural support, access, retention, and other functional requirements behave as intended.
It can be inspected.
The drawing identifies what matters and the factory has a practical method to measure it.
It can be repeated.
The manufacturing package, process, tooling, fixtures, finish, BOM, and revisions are stable enough that the next unit does not depend on someone’s memory.
That is the real finish line of CAD-to-prototype development.
Not a pretty rendering.
Not a perfect screenshot.
Not even one impressive sample.
A production prototype earns approval when the engineering team and the manufacturer can both explain how the next hundred will be made—and why they should come out the same.
Вопросы и ответы
В чем заключается процесс создания прототипа на основе CAD-модели?
Short answer: It is the process of converting a CAD design into a physical sample through DFM review, process selection, fabrication, assembly, testing, and design revision.
The CAD file defines geometry, but manufacturing adds material behavior, tooling limits, tolerances, finishes, hardware, and assembly realities. A production-focused workflow addresses those issues before volume release.
В чём заключается разница между прототипом и серийным прототипом?
Short answer: A prototype proves design ideas; a production prototype verifies that the near-final design can be manufactured, assembled, tested, and inspected using production-intent specifications.
Early prototypes may use temporary materials or processes. A production prototype should closely represent the final material, geometry, finish, interfaces, hardware, and manufacturing approach.
Следует ли проводить DFM до или после изготовления прототипа?
Short answer: DFM should happen before prototype fabrication and continue after the prototype reveals new information.
Pre-prototype DFM catches known manufacturing risks cheaply. Physical validation then reveals issues that were difficult to predict in CAD, allowing the design to be refined before production.
Нужны ли мне для изготовления прототипа как 3D-CAD-модели, так и 2D-чертежи?
Short answer: In most B2B manufacturing projects, yes. The 3D model defines geometry while the 2D drawing communicates manufacturing and inspection requirements.
A drawing can specify tolerances, material, finish, cosmetic surfaces, threads, installed hardware, critical dimensions, masking, inspection notes, and revision status that may not be obvious from the model alone.
Сколько прототипов необходимо изготовить перед запуском в серийное производство?
Short answer: There is no fixed number. The required iterations depend on product complexity, risk, design maturity, manufacturing process, and test results.
Simple enclosures may require one or two iterations. Dense server, GPU, thermal, structural, or high-interface projects can require several revisions before the manufacturing package stabilizes.
Почему CAD-модель может идеально подходить, а физический прототип — нет?
Short answer: Real materials and manufacturing processes introduce bend behavior, springback, welding distortion, coating thickness, tolerance accumulation, hardware variation, and assembly constraints.
CAD normally represents nominal geometry. Production creates physical variation, which is why tolerance strategy and real-hardware validation are necessary.
Can the prototype manufacturing process differ from mass production?
Short answer: Yes, especially during early development, but the differences should be understood before the prototype is approved for production.
Low-volume prototypes may use manual fabrication, CNC machining, or temporary fixtures. Final validation should confirm that any process changes planned for volume manufacturing do not alter fit, function, strength, appearance, or quality.
When is a custom chassis prototype ready for mass production?
Short answer: It is ready when design revisions are frozen, real hardware has been validated, manufacturing requirements are documented, and a repeatable production process has been demonstrated.
For higher-risk projects, a pilot lot should follow prototype approval so bend consistency, coating, assembly, inspection, purchased hardware, and process variation can be checked across multiple units.
Mark Lee - Founder & Server Chassis OEM/ODM Specialist
Mark Lee is the founder of ISTONECASE, with 20 years of experience in the server chassis industry. He specializes in OEM/ODM solutions for GPU and AI, rackmount, industrial, wallmount, NAS, Mini-ITX and multi-node chassis. His expertise supports customized hardware projects for data centers, AI computing, enterprise storage, edge computing, networking and industrial applications.