Habla con nuestro Chasis de servidor Equipo de ingenieros y ventas
24 000 suscriptores
Indíquenos la aplicación, el tipo de chasis, la altura del rack, la placa base, la GPU, las bahías para unidades, la fuente de alimentación, el sistema de refrigeración, las conexiones de E/S y la cantidad que desea pedir. Nuestros ingenieros y nuestro equipo de ventas le recomendarán un modelo estándar o una configuración OEM/ODM para su proyecto.
Never approve an enclosure by GPU length alone. Check length, height, thickness, connector position, cable bend space, retention hardware, airflow, and the physical installation path.
Verify the exact graphics card SKU, not simply the GPU family. Two RTX 5090 cards can differ by more than 50 mm in length.
Published GPU dimensions describe the card. They do not always describe the complete space the installed card needs.
NVIDIA recommends additional clearance around some high-end GPUs for power cables and airflow, proving that nominal card dimensions are only the starting point.
Front fans, radiators, drive cages, support brackets, risers, and structural sheet metal can reduce usable GPU clearance.
For OEM and repeat-production projects, validate the final configuration with drawings and a physical prototype before freezing the enclosure design.
Selecting an enclosure for a GPU sounds easy.
Find the card length. Find the chassis specification. Compare the two numbers.
Done.
Except that this is exactly how expensive compatibility mistakes begin.
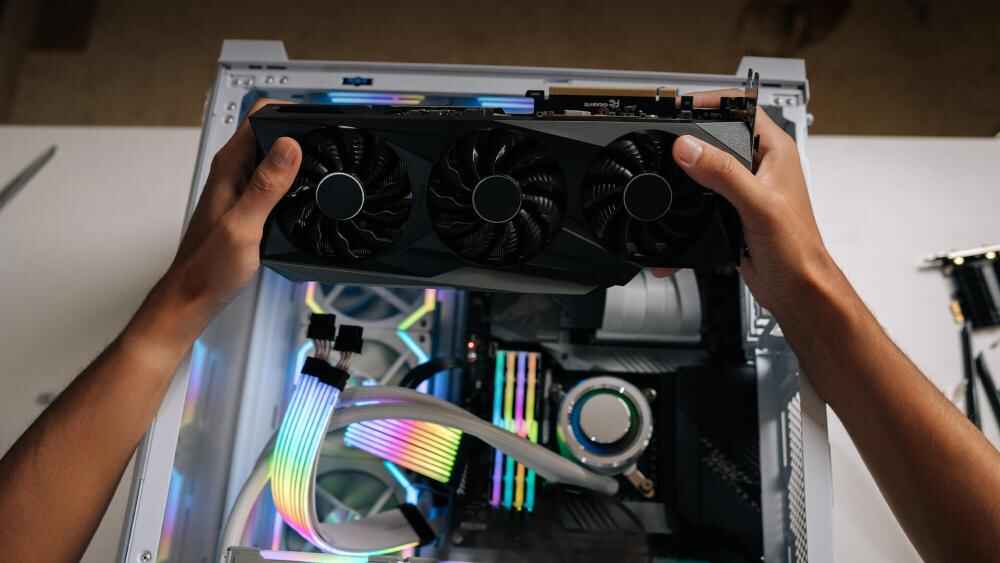
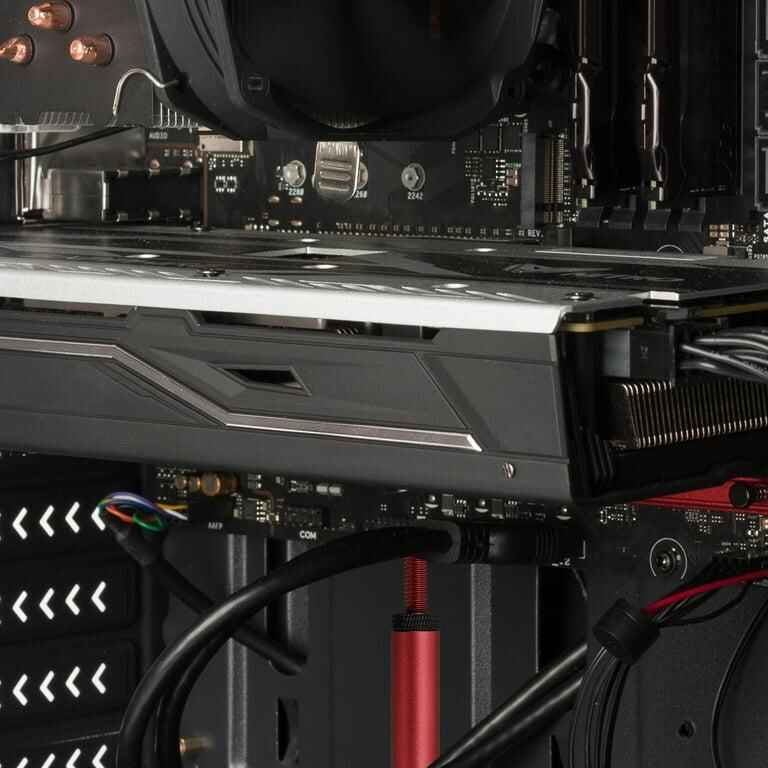
A GPU listed at 330 mm does not necessarily fit comfortably inside an enclosure advertising 350 mm of maximum GPU clearance. The missing 20 mm may disappear after you add a front fan wall, radiator, power connector, retention bracket, cable bundle, sheet-metal flange, or the angle required to physically get the card through the opening.
That distinction matters far more in B2B hardware projects than it does in a one-off desktop build.
If you are ordering 100, 500, or 2,000 systems, “we can probably make it fit” is not a compatibility specification.
It is a future rework bill.
GPU Dimensions Are a 3D Envelope, Not One Number
When engineers discuss GPU dimensions, there are three obvious measurements:
Length — usually measured from the rear I/O bracket toward the opposite end of the card.
Altura — the distance extending upward from the PCIe interface toward the side panel or chassis cover.
Thickness — the amount of lateral space occupied across PCIe expansion slots.
Those numbers matter.
They are just not enough.
The real installation envelope can also include:
power connector protrusion;
cable bend radius;
rear bracket geometry;
heatsink or shroud overhang;
backplate thickness;
GPU support hardware;
riser cards;
adjacent PCIe cards;
fan walls;
radiator assemblies;
drive cages;
cable-routing channels;
chassis reinforcement;
removal and installation space.
That is why buyers researching Graphics Card Dimensions for GPU servers should start with the actual production card rather than assuming every card based on the same GPU will occupy the same mechanical envelope.
The silicon may be the same.
The metal around it often is not.
Current GPU Specifications Show How Big the Difference Can Be
Here is a useful real-world comparison.
NVIDIA currently publishes its GeForce RTX 5090 Founders Edition at 304 mm long and 137 mm wide. Its installation guidance goes further: NVIDIA says the enclosure should provide space for a 304 × 137 × 61 mm installation envelope, while another 36 mm of space should be planned for power cables. NVIDIA also recommends reserving clearance around the graphics card equivalent to another unused expansion slot to improve airflow.
GPU family name alone cannot approve compatibility
That 55 mm length difference is roughly 18%.
For chassis engineering, 55 mm is huge.
It can be a fan.
A drive cage.
Part of a power supply.
A retention structure.
Or the difference between closing the lid and starting over.
Why “Maximum GPU Length” Is a Weak Specification by Itself
Here is the position I take with buyers:
Maximum GPU length is one of the least useful enclosure specifications when it is presented alone.
Sounds harsh?
Consider what the number actually tells you.
If a chassis advertises “maximum GPU length: 350 mm,” you still do not know whether that figure assumes:
no front radiator;
no front fan;
a specific fan thickness;
no drive cage;
no retention crossbar;
a particular motherboard slot position;
no power connector at the front edge;
a vertical or horizontal installation;
an empty adjacent PCIe slot.
A buyer sees:
GPU: 330 mm Chassis limit: 350 mm
Twenty millimeters of margin.
Looks safe.
I would not approve it.
That 20 mm may already belong to something else.
This is why GPU Enclosure Compatibility should be evaluated against the complete installed system rather than a chassis datasheet in isolation. The site’s high-density enclosure guidance makes the same engineering point: GPU fit interacts with card spacing, connector clearance, retention, airflow, cabling, and service access.
The SFF-Ready Standard Makes the Problem Easy to See
NVIDIA’s SFF-Ready guideline provides a useful benchmark because it does not focus on GPU length alone.
For qualifying enthusiast GeForce cards, the current guideline specifies:
304 mm maximum length
151 mm maximum height, including power-cable bend radius
50 mm or 2.5 slots maximum depth
NVIDIA says these limits are intended to preserve space, clearance, and working room inside compatible small-form-factor cases.
The GPU is not a rectangular brick floating in CAD. Power has to enter it. Air has to reach it. A technician has to install it. The enclosure still needs to close afterward.
Step 1: Lock the Exact GPU Part Number
Do this before measuring anything else.
Do not write:
GPU: RTX 5090
Write:
GPU manufacturer: Exact model: Exact part number: Revision if applicable:
Why?
Because add-in-board manufacturers create their own coolers, PCBs, shrouds, brackets, backplates, and connector layouts.
NVIDIA itself states that graphics card specifications can vary by add-in-card manufacturer and advises users to check the manufacturer’s specifications for the actual shipping model.
This matters even more when procurement has multiple approved suppliers.
Imagine engineering validates Card A.
Purchasing later substitutes Card B because the GPU chip, memory capacity, and performance look equivalent.
Electrically?
Maybe fine.
Mechanically?
You may have just added 40 mm to the cooler.
Your approved enclosure is no longer approved.
Step 2: Measure GPU Length Properly
Length gets most of the attention, so start there.
But establish your reference points.
For an enclosure project, you normally want to know the distance between the rear PCIe mounting plane and the furthest forward feature of the installed GPU.
Do not casually exclude:
shroud extensions;
protruding heatsink fins;
front-mounted connectors;
retention tabs;
decorative cooler structures;
factory brackets.
Then compare that with the usable enclosure space.
Not the outside chassis depth.
Not the distance from rear panel to front panel.
Usable space.
If a 600 mm deep enclosure has a 38 mm fan wall, backplane structure, front I/O assembly, cable zone, and sheet-metal reinforcements in front of the GPU, none of those millimeters belong to your graphics card.
When comparing GPU Length Clearance across rackmount platforms, verify what hardware is installed when the manufacturer quotes the limit. The site’s 4U GPU chassis range itself varies in internal layout, PCIe capacity, cooling structure, and motherboard support, so the nominal rack height alone does not answer GPU fit.
Step 3: Check Card Height and Side-Panel Clearance
This measurement causes more trouble than many buyers expect.
Why?
Power connectors.
A tall GPU might fit beneath the chassis cover while bare.
Then the power cable goes in.
Now the connector housing and cable need to turn.
Suddenly the lid touches the cable.
Bad situation.
For its RTX 5090 installation guidance, NVIDIA explicitly recommends 36 mm of additional space for power cables beyond the stated card clearance.
And use the actual power cable you expect in production.
A soft lab cable and a short, stiff high-current harness can behave very differently.
Step 4: Translate Slot Count Into Millimeters
“2-slot.”
“2.5-slot.”
“3-slot.”
“3.5-slot.”
These descriptions are useful shorthand.
They are not substitutes for millimeter dimensions.
One manufacturer’s “3-slot” cooler may not occupy exactly the same thickness as another manufacturer’s.
For dense systems, record both:
nominal slot classification;
actual maximum card thickness in millimeters.
This becomes especially important when evaluating GPU Slot Thickness in a rackmount platform. A form factor that technically provides enough PCIe slots may still lack the physical spacing, cooling volume, or riser arrangement required by the chosen cards. The site’s 1U, 2U, and 4U comparison similarly treats GPU support as part of a wider rack-density and cooling decision rather than an expansion-slot count alone.
For multi-GPU systems, thickness affects another variable:
pitch.
If cards sit too close together, the system may still assemble perfectly.
Then thermals suffer.
Physical fit passed.
System design failed.
Step 5: Add Power-Connector Keep-Out Zones
This is where CAD models frequently become too optimistic.
A simplified GPU model may show the card body.
It may not show the connected cable.
Add the actual connector and create a realistic keep-out volume around it.
Compruébalo:
connector direction;
connector insertion depth;
cable bundle diameter;
minimum practical bend;
nearby sheet metal;
side panel;
adjacent GPU;
retention hardware;
fan housing;
radiator frame.
Do not bend a high-current cable sharply simply because CAD says there is no collision.
Mechanical fit must respect how the real harness needs to sit.
Step 6: Subtract Fans, Radiators, and Drive Hardware
Case specifications often become conditional here.
A chassis may support a long GPU.
A chassis may support a thick radiator.
The dangerous assumption is:
therefore it supports both at the same time.
Not always.
Some enclosure designs use the same internal volume for alternative configurations.
No radiator?
More GPU room.
Install a radiator and fan stack?
GPU clearance drops.
The same applies to:
front storage cages;
internal PSUs;
pump brackets;
cable bars;
card guides;
hot-swap backplanes.
This is why the installed configuration should appear in the compatibility drawing.
Do not approve isolated components.
Approve assemblies.
Step 7: Include the GPU Retention Structure
Large GPUs are not only getting physically larger.
They are heavy.
The site’s existing engineering guide notes that current graphics cards can exceed 2 kg and explains how a retention structure changes the mechanical load path between the GPU and chassis.
That bracket needs room too.
And this is where a real forum case caught my attention.
A builder had a chassis officially rated for a 369 mm maximum GPU and a graphics card listed at 357 mm.
On paper?
Twelve millimeters spare.
Easy.
Then installation started.
The GPU mounting bracket collided with a front fan. The builder removed the fan. The bracket then hit the frame supporting the front fan assembly. After forcing the bracket into place, the graphics card itself still could not be maneuvered comfortably into the chassis without tilting it through awkward angles.
The buyer had even checked compatibility tools beforehand.
The numbers said yes.
The physical system said no.
The original forum discussion shows exactly why a 1D specification can fail in a 3D assembly.
That story sticks with me because the mistake was not stupidity.
The buyer checked the specifications.
The specifications were simply incomplete for the decision being made.
Step 8: Check the Installation Path, Not Just the Final Position
This gets missed constantly.
CAD shows the GPU sitting perfectly inside the enclosure.
Great.
How does it get there?
A long GPU may need to be:
inserted at an angle;
rotated around a fan wall;
lowered toward the PCIe slot;
moved sideways into the rear bracket;
pushed into a riser;
secured with a retention mechanism.
Now imagine only 5 mm of nominal free space exists at the far end.
The final position works.
The insertion path does not.
For production systems, ask engineers to model or physically test the installation sequence.
The GPU should not require:
flexing the PCB;
forcing sheet metal;
temporarily removing unrelated components;
scraping the heatsink;
bending connectors;
loosening structural hardware.
If assembly technicians need “the trick” that only one senior engineer knows, the design is not production-friendly.
Step 9: Leave Airflow Space
A GPU that barely fits can still be the wrong GPU for the enclosure.
Cooling needs space.
NVIDIA’s RTX 5090 guidance recommends leaving clearance around the graphics card equivalent to another unused expansion slot because it can improve airflow.
That should change the buying question.
Do not ask only:
Will the card fit?
Ask:
Will the card fit while receiving the airflow it was designed to use?
For air-cooled GPU servers, inspect:
fan inlet clearance;
blower intake;
exhaust direction;
adjacent card spacing;
recirculation zones;
cable obstruction;
fan-wall position;
static-pressure requirement.
A 76 mm card stuffed into a 77 mm cavity technically fits.
That does not make it good thermal engineering.
Step 10: Check Service Clearance
Now assume the GPU fails six months after deployment.
Can a technician remove it?
This sounds like tomorrow’s problem.
It becomes today’s design requirement very quickly when the system is in a data center, factory, edge cabinet, or overseas customer site.
Ask:
Can the power cable be disconnected by hand?
Can the retention bracket be reached?
Can the card move far enough to disengage from the PCIe slot?
Does another GPU need to be removed first?
Do fan modules block extraction?
Does the system need to leave the rack?
Can the GPU be replaced without disconnecting storage or cooling hardware?
Good enclosure design protects service time as aggressively as it protects component fit.
Step 11: Put the Measurements Into the RFQ
Procurement should not send:
Need chassis supporting RTX 5090.
That leaves too much interpretation.
A better RFQ includes:
GPU Input
What to Provide
Manufacturer
Exact GPU vendor
Modelo
Full commercial model name
Part number
Manufacturer part number
Length
Maximum installed card length
Altura
Maximum card height
Thickness
Millimeters plus slot classification
Peso
Card mass
Power connector
Type and physical location
Cable keep-out
Required bend and routing space
PCIe orientation
Direct slot, riser, vertical, horizontal
Quantity
Number of GPUs per enclosure
Refrigeración
Blower/open-air/liquid-cooled configuration
Retention
Required support or restraint method
Ruta de servicio
Required GPU removal direction
Approved alternatives
Every alternate GPU SKU
If you need a repeatable sourcing workflow, How to Measure GPU Clearance should become part of the RFQ package rather than a measurement made after suppliers quote. The site’s chassis RFQ guide already recommends providing GPU interfaces, controlled drawings, critical dimensions, cooling requirements, and production configuration before pricing.
That saves arguments later.
“What did you mean by supports this GPU?”
Exactly.
Define it before the PO.
How Much GPU Clearance Margin Should You Leave?
There is no universal magic number.
Five millimeters may be plenty in one direction and useless in another.
The right margin depends on:
fabrication tolerances;
GPU dimensional tolerance;
motherboard position;
riser location;
removable panels;
cable stiffness;
cooling hardware;
assembly direction;
service needs;
production variability.
I prefer functional clearance over arbitrary clearance.
Por ejemplo:
A 20 mm empty zone in front of the GPU is less valuable than 10 mm placed exactly where the power cable, retaining latch, or technician’s fingers need it.
PCIe reference → GPU height → power connector → cable bend → chassis cover
For thickness:
Motherboard/riser reference → GPU cooler → airflow gap → adjacent GPU or chassis wall
Then add applicable manufacturing and assembly tolerance.
This quickly exposes optimistic specifications.
If the total available space is 360 mm and your combined requirement is 359 mm, the CAD model may turn green.
I would still be nervous.
Production parts are not mathematical surfaces.
Prototype With the Worst-Case GPU
If your enclosure must support three approved cards, do not prototype with the smallest one.
Install the longest.
Then the tallest.
Then the thickest.
If those characteristics belong to different models, test all relevant extremes.
Also populate:
real fans;
real PSU cables;
risers;
retention hardware;
adjacent cards;
storage;
radiator assemblies;
side panels.
Then remove the GPU.
And reinstall it.
A prototype that only proves “we managed to assemble it once” is weak evidence.
Repeatability matters.
The Buying Rule I Would Use
If I had to reduce this entire article to one procurement rule, it would be this:
Never approve a GPU enclosure from the GPU name and maximum chassis length alone. Approve an exact card SKU inside an exact system configuration.
That changes the question from:
Does this enclosure support RTX 5090?
to:
Does this enclosure support this exact RTX 5090 card, in this PCIe position, with this power cable, fan wall, retention system, airflow requirement, assembly path, and service procedure?
Longer question.
Much cheaper answer.
For custom GPU server projects, send the chassis manufacturer the exact GPU model, mechanical drawing, quantity, motherboard layout, power-cable requirements, retention method, fan arrangement, and rack-depth limits before freezing the enclosure.
Millimeters are cheap during design.
They get expensive after production.
Preguntas frecuentes
¿Qué dimensiones de la GPU debo comprobar antes de elegir una carcasa?
Also verify cooler overhangs, rear bracket geometry, retention hardware, airflow gaps, and the installation/removal path. Nominal card dimensions alone may not represent the complete installed envelope.
¿Cómo puedo saber si mi tarjeta gráfica cabe dentro de una carcasa?
Compare the exact GPU model against the enclosure’s usable internal clearance in all three dimensions.
Then subtract space occupied by fans, radiators, drive cages, brackets, cables, risers, and other hardware. A length-only comparison is not enough.
¿Cuánto espacio libre adicional debo dejar alrededor de la GPU?
There is no single clearance value that works for every enclosure.
Leave enough space for manufacturing tolerances, cable routing, airflow, assembly, and servicing. The location of the free space matters more than simply adding an arbitrary number of millimeters.
¿Es importante el grosor de la ranura de la GPU a la hora de elegir una carcasa?
Yes. GPU thickness determines how many PCIe slots and how much lateral space the card consumes.
It also affects airflow, adjacent GPU spacing, riser design, and whether other expansion cards remain usable. Record actual thickness in millimeters rather than relying only on “2-slot” or “3-slot” labels.
¿Es suficiente con la longitud máxima de la GPU para confirmar la compatibilidad?
No. Maximum GPU length is only one part of compatibility.
A card can satisfy the length specification but still collide with a fan, radiator, support bracket, power cable, chassis frame, or side panel.
¿Debo comprobar el modelo exacto de la GPU o solo la serie de la GPU?
Always check the exact model and part number.
Different manufacturers can build cards around the same GPU with very different coolers and dimensions. Current RTX 5090 examples differ by more than 50 mm in length.
¿Por qué es importante dejar espacio libre alrededor de los cables de alimentación?
The connector and cable can require significant space beyond the GPU body.
For example, NVIDIA’s RTX 5090 installation guidance recommends planning 36 mm of additional space for power cables. A GPU can physically fit while its power connection cannot.
How should an OEM validate GPU enclosure compatibility?
Use drawings first, then validate the final assembly with a physical prototype.
Install the exact GPU, cables, fans, retention hardware, risers, and adjacent components. Check assembly, airflow, side-panel closure, service access, and GPU removal before approving volume production.
Mark Lee - Founder & Server Chassis OEM/ODM Specialist
Mark Lee is the founder of ISTONECASE, with 20 years of experience in the server chassis industry. He specializes in OEM/ODM solutions for GPU and AI, rackmount, industrial, wallmount, NAS, Mini-ITX and multi-node chassis. His expertise supports customized hardware projects for data centers, AI computing, enterprise storage, edge computing, networking and industrial applications.